I’ll never forget the first time I saw how much damage could be caused by a poorly fitted pack. Our fun little overnight hike along the 6 Foot Track in the Blue Mountains had turned into a torture session for Wild Woman Nicky, whose pack had caused bloody welts all across her hips. Just looking at it made me wince.
Nicky’s mistake?
Borrowing her husband’s old scouts backpack mistakenly thinking all packs were pretty much the same. She paid the price for lugging a heavy, ill-fitting, old fashioned sack on her back with her blood.
Unlike choosing a day pack, which is almost as easy as deciding what colour you like best, choosing an overnight or multi-day backpack requires time, research and a whole lotta trying on. This takes time, but it’s well worth the effort. Here’s a few hard-won hints to help you on your way.
One Size Does Not Fit All
When it comes to backpacks, one size does NOT fit all. Most of us gals have healthy hips, beautiful breasts, narrower shoulders, and variable body lengths. We need an adjustable, customisable, female-inspired design to suit our body shapes.
Are You Ultra-Lite or Ultra Gourmet?
Some wild women like to go ultra-lite, decanting everything into tiny containers, forgoing all luxuries and even cutting the end off their toothbrushes. Others like to pack gourmet food, their favourite bone-china mug, chocolate and wine.
There’s not right way, but if you’re planning to carry more, you’ll need additional padding to handle the extra weight.
You MUST Customise Your Pack
If you’re new to hiking, please don’t buy your pack online because you like the colour. You want to have the opportunity to have your pack customised to your body shape by an expert. Trying to work this out by watching YouTube videos just won’t cut it.
The easiest way to learn how to adjust and customise your pack is to go into your local gear shop and make friends with the experts. A good shop assistant will have you try on several different 55 – 65 litre packs, specifically customising the pack’s torso length to suit you. They might not get it right first go, so take note of how they do it so you can fiddle with it later. This is critical for a good fit and this feature is different for each brand.
Next, they’ll firmly tighten the hip harness snugly over your pelvis after loading about 15kg of customised weight into the pack to check the pressure points.
Then they’ll adjust the shoulder and chest strap to suit your body. These features and adjustments are slightly different for each brand so it’s great to try on a few different styles just to be sure.
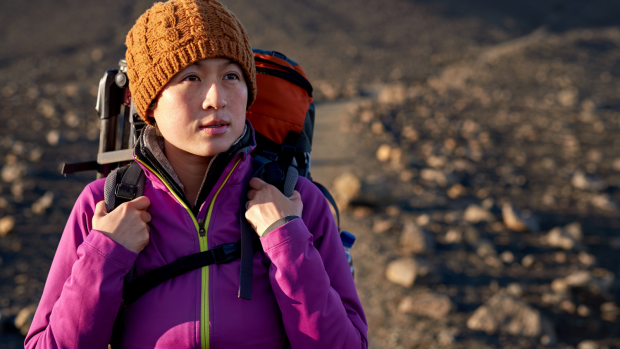
Your new pack should fit snugly over your shoulders and curve into your lower back. Nothing should be gouging you and the chest strap should fit comfortably, well above your boobies but below your collar bones.
Play with all the zippers, straps, buckles, and doodads until you are comfortable with what they do. Learn how to tweak them so that you can make reasonable adjustments when you leave the safety of the shop and step out onto the trail.
No Full Pack Is Perfectly Comfortable
It’s important to remember that no fully laden pack is perfectly comfy. Rather, as you hike, you’ll constantly be re-locating the discomfort from one body part to another by fiddling with the hip, shoulder, load-lifting and chest strap adjusters.
Don’t forget to train in your pack with a full load to fine tune your adjustments before committing yourself to days of disappointment.
If You Can’t Prevent, Ensure You Cure
If for some reason you do find yourself hiking with an ill-fitting pack, having some paw-paw ointment can help alleviate the welts caused by rubbing.
How To Tighten Your Pack On The Trail
Start at Your Hips
Tightening the hip harness first builds a solid foundation and allows the pack to hang off your pelvic girdle, which provides a natural base. Start by resting your pack on your back with all straps loose, sit the pack snuggly on your hips and tighten firmly. Ensure it’s resting on your pelvis, not cinching your waist.
Adjust Your Shoulder Straps
Pull the shoulder straps back toward your body so that the pack fits snuggly into your lower back and the shoulder straps wrap comfortably over your shoulders without space in between.
Tweak the load lifters
This is often forgotten, so make sure the load lifting strap which goes up from your shoulders to the pack are at a 45-degree angle. The shoulder straps should follow the angle of your shoulder without rising up and your pack should not touch your head.
Adjust the chest strap height and length
Finally, slide the chest strap attachments to a comfortable height so the strap crosses comfortably between your boobs and your collar bone. Snap shut and adjust to fit loosely. This keeps your shoulder straps in place, but you might need to tweak occasionally as you walk.
Voila!
Your pack is fitted beautifully and you’re ready to rock and roll. But remember, there’s no such thing as a perfect fit, so you’ll want to tweak, loosen, tighten and adjust as you hike.


